Milestone XProtect Integration
Milestone XProtect is one of the most popular Video Management Systems. ForensiQ is able to send alarms to this system so you can manage incidents in your well-known platform.
Mobotix HUB
This guide in its entirety is also applicable to the Mobotix HUB software solution - simply follow the steps laid down below, as you would with Milestone XProtect.
Consult the following table for the different feature sets of Milestone XProtect editions:
| XProtect Edition / Feature | Alarm Manager | E-mail notification | Recording on Alarm |
|---|---|---|---|
| Corporate | ✓ | ✓ | ✓ |
| Expert | ✓ | ✓ | ✓ |
| Professional+ | ✓ | ✓ | ✓ |
| Express+ | ✓ | ✓ | ✓ |
The Essential+ edition does not have alarm functionality, therefore it is not supported by ForensiQ.
Tested versions
This guide has been tested on the following editions:
- Milestone XProtect 2021 R2
- Milestone XProtect 2022 R3
- Milestone XProtect 2024 R1
- Milestone XProtect 2025 R1
- Milestone XProtect 2025 R3
Before you start
In this guide it is assumed that Milestone XProtect is installed on a computer in your network and you know how to configure it when using it without ForensiQ. For further details, please visit the official site of Milestone.
Requirements:
- Cameras are reachable from both ForensiQ and Milestone XProtect, and ForensiQ is able to connect to Milestone XProtect.
- Please make sure that each camera you intend to use in ForensiQ is also registered in Milestone XProtect, as described in the Milestone documentation here.
- You have administrator privileges on the device running Milestone XProtect (both for Microsoft Windows and within Milestone XProtect).
Milestone XProtect configuration
User
ForensiQ requires access to Milestone XProtect, therefore a new user should be created with administrator privileges.
-
In the Milestone XProtect Management Client, go to the Site Navigation panel Security Roles.
-
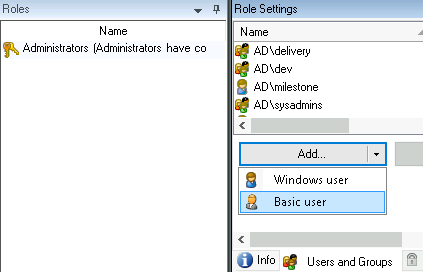
Click on Administrators in the Roles panel.

- Find the Users and Groups tab at the bottom of the Role Settings panel. Click the Add... dropdown and select the Basic user option.
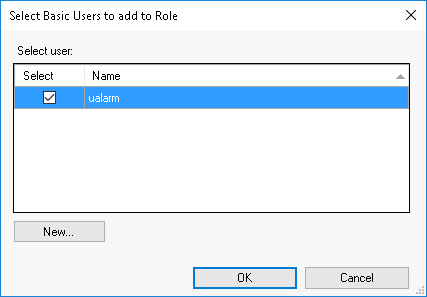
- In the Select Basic Users to add to Role pop-up, click the New button.
-
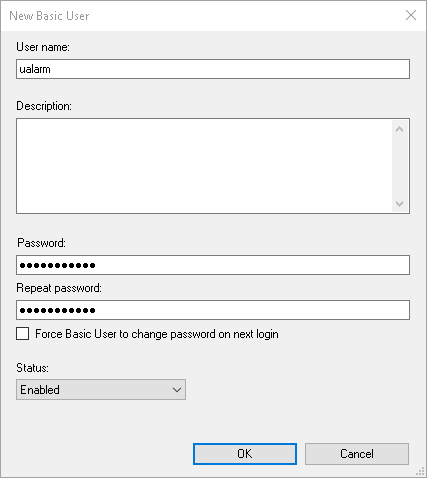
A new pop-up appears. Fill in the form with new user credentials and click OK. Use a complex password with capital and small letters, numbers and special characters.
-
Add this basic user to the Administrators by clicking OK.
Event
- In the Milestone XProtect Management Client, open Tools in the upper menu bar Options select the Analytics Events tab.
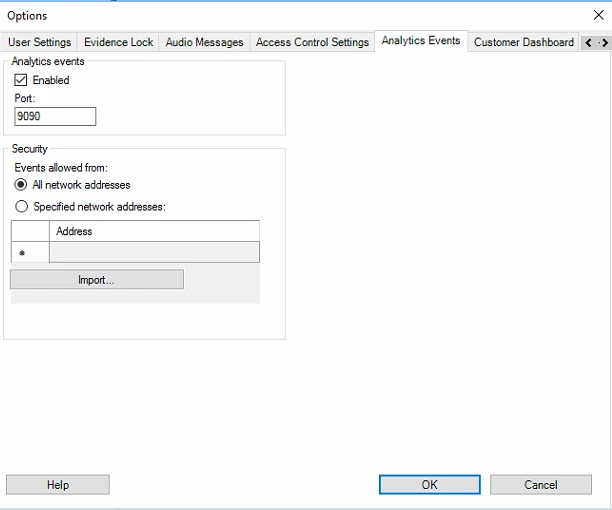
Under Analytics events, tick the box beside Enabled then press OK.
-
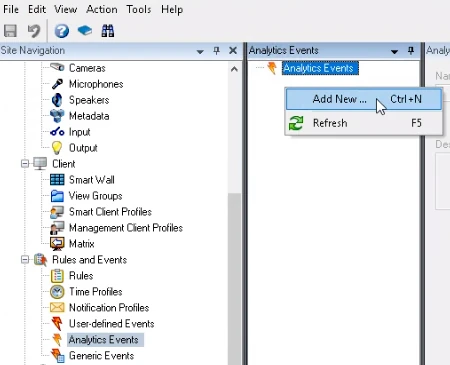
In the Site Navigation panel, go to Rules and Events Analytics Events.
-
Right click on the Analytics Events panel Add new.
-
Set a name for the Event.
-
Click the Save button in the top left corner.
Recording Rule
If your system is not recording continuously, it is recommended to start recording on each triggered alarm. A Rule should be created for this purpose.
If your system has a custom recording logic, you can skip this step.
-
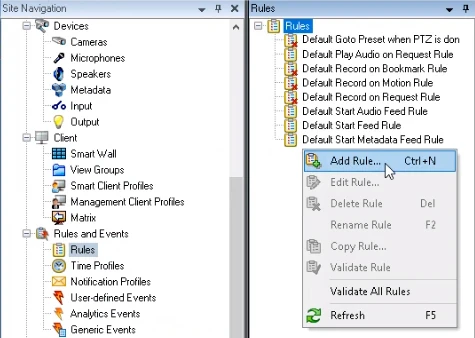
In the Milestone XProtect Management Client, go to the Site Navigation panel Rules and Events Rules.
-
Right-click on the Rules panel Add Rule
-
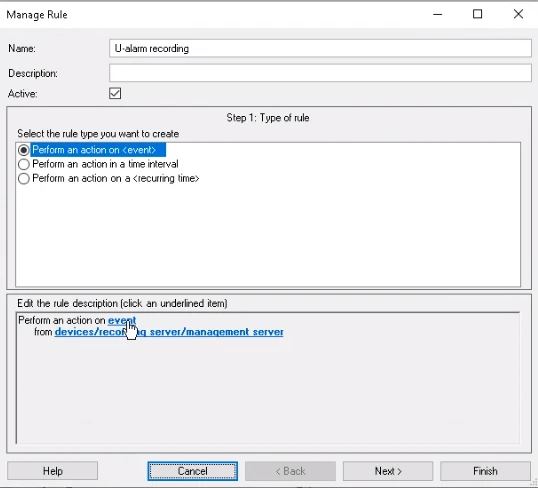
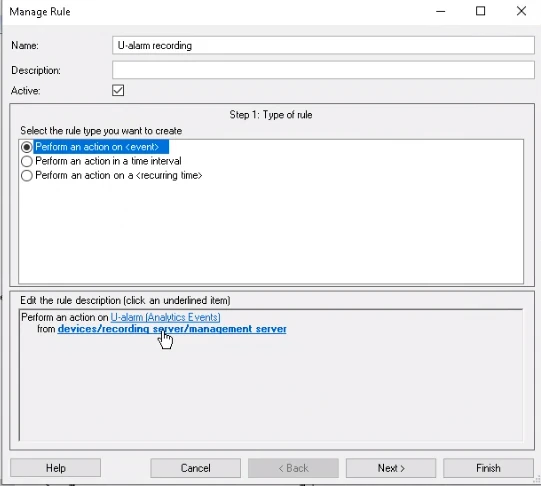
Set any Name.
-
As the Type of rule, select Perform action on event. Click on the blue underlined "event" word in the lower panel.
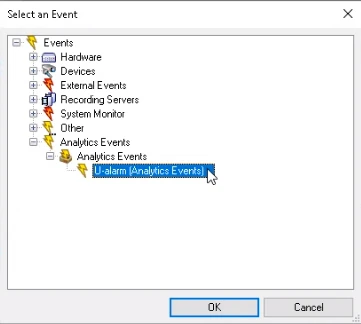
- In the pop-up, select Events Analytics Events select the Analytics Event you created before. Click OK.
- Click on the blue underlined "devices/..." line in the lower panel (after "from").
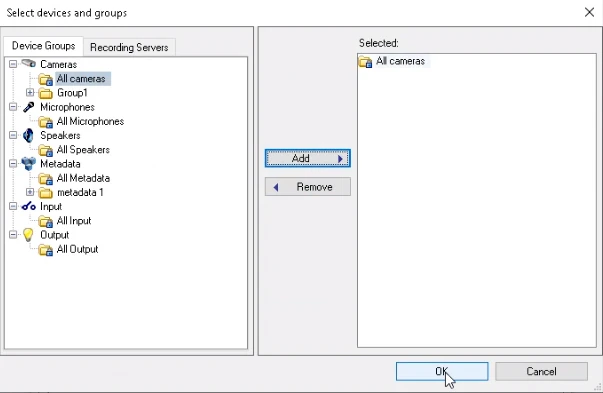
- In the pop-up, select Cameras All cameras. Click the Add button. Click OK.
-
Click Next.
-
Skip the Conditions Step (2). Click Next again.
-
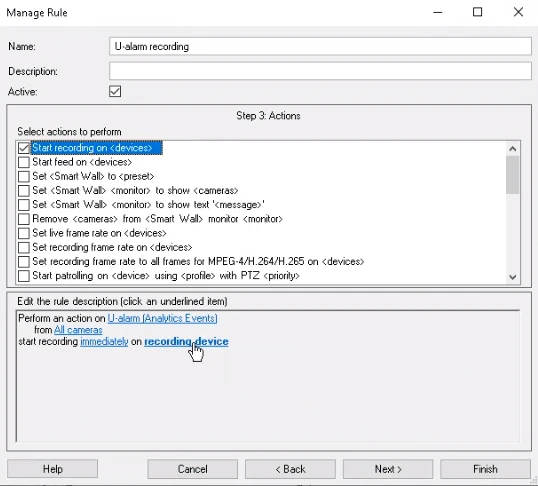
In the Actions Step (3) select Start recording on devices. Click on the blue underlined "recording device" words in the lower panel.
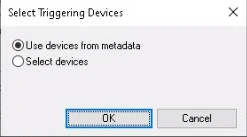
- In the pop-up, select Use devices from metadata. Click OK.
-
The recording will start immediately on alarm. You can set other (even negative) values by clicking on the blue underlined "immediately" word in the lower panel.
-
Click the Next button.
-
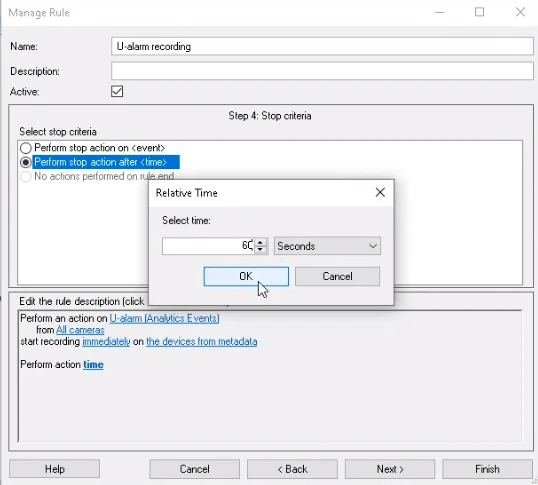
In the Stop Criteria (4) step, select Perform stop action after time. Click the blue underlined "time" word in the lower panel and set the length of the recordings. Click OK.
-
Click Next.
-
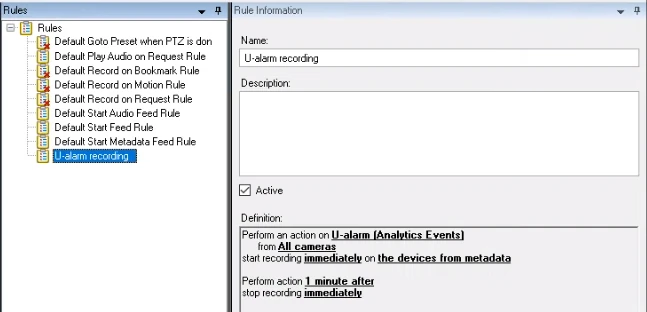
Skip the "Stop actions" (5) step. Click Finish. The new rule is created.
Alarm
Now an Alarm needs to be configured in Milestone XProtect.
-
In the Milestone XProtect Management Client, go to the Site Navigation panel Alarms Alarm Definitions.
-
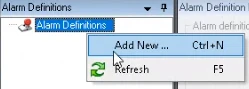
Right-click on the Alarm Definitions panel Add new.
-
Fill the form. Make sure that the alarm is Enabled.
-
Set any Name for the alarm.
This alarm will represent all notifications which come from ForensiQ.
-
Set the Triggering event to Analytics Events, then select the Analytics Event you created before.
-
At the Sources setting, click the Select... button. A pop-up will appear.
-
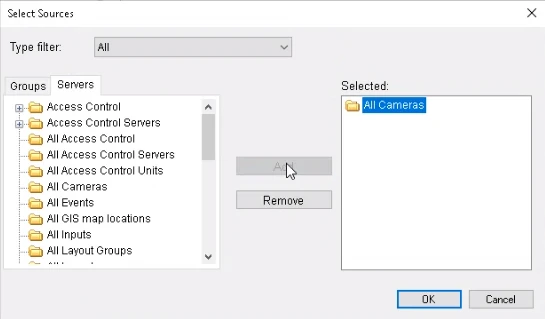
Click on the Servers tab. Select the All Cameras node and click the Add button. Click OK.
- If you are familiar with Milestone XProtect, you can configure the rest of the settings as you wish or you can leave them as they are.
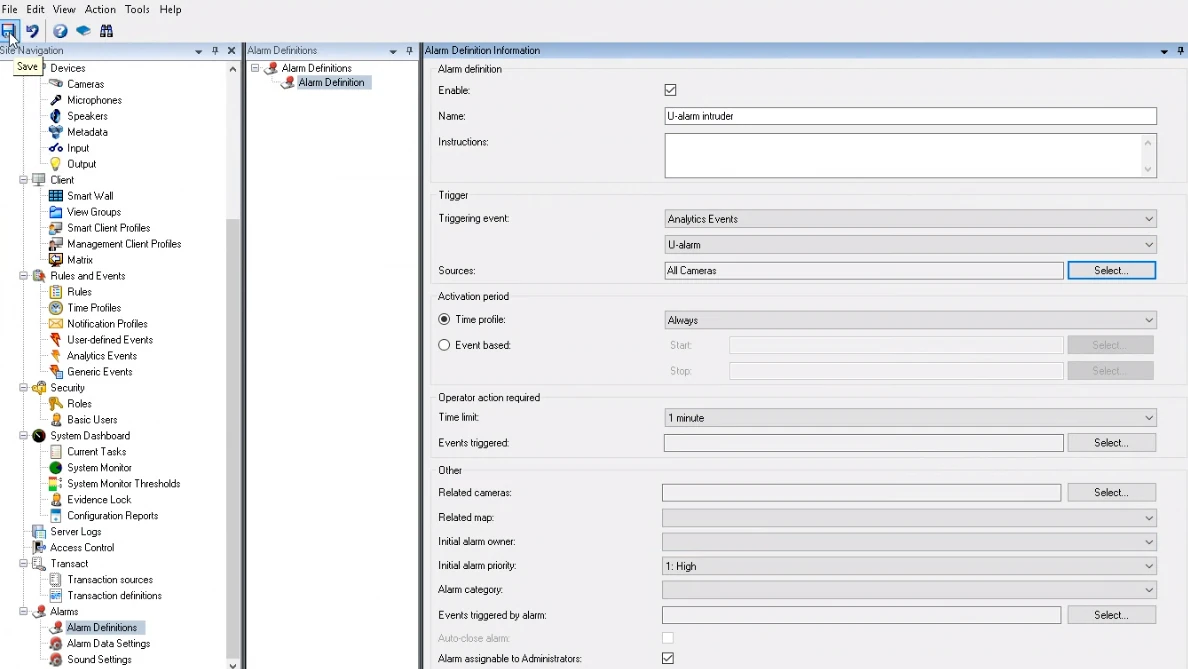
- Click the Save button in the top left corner (once enabled).
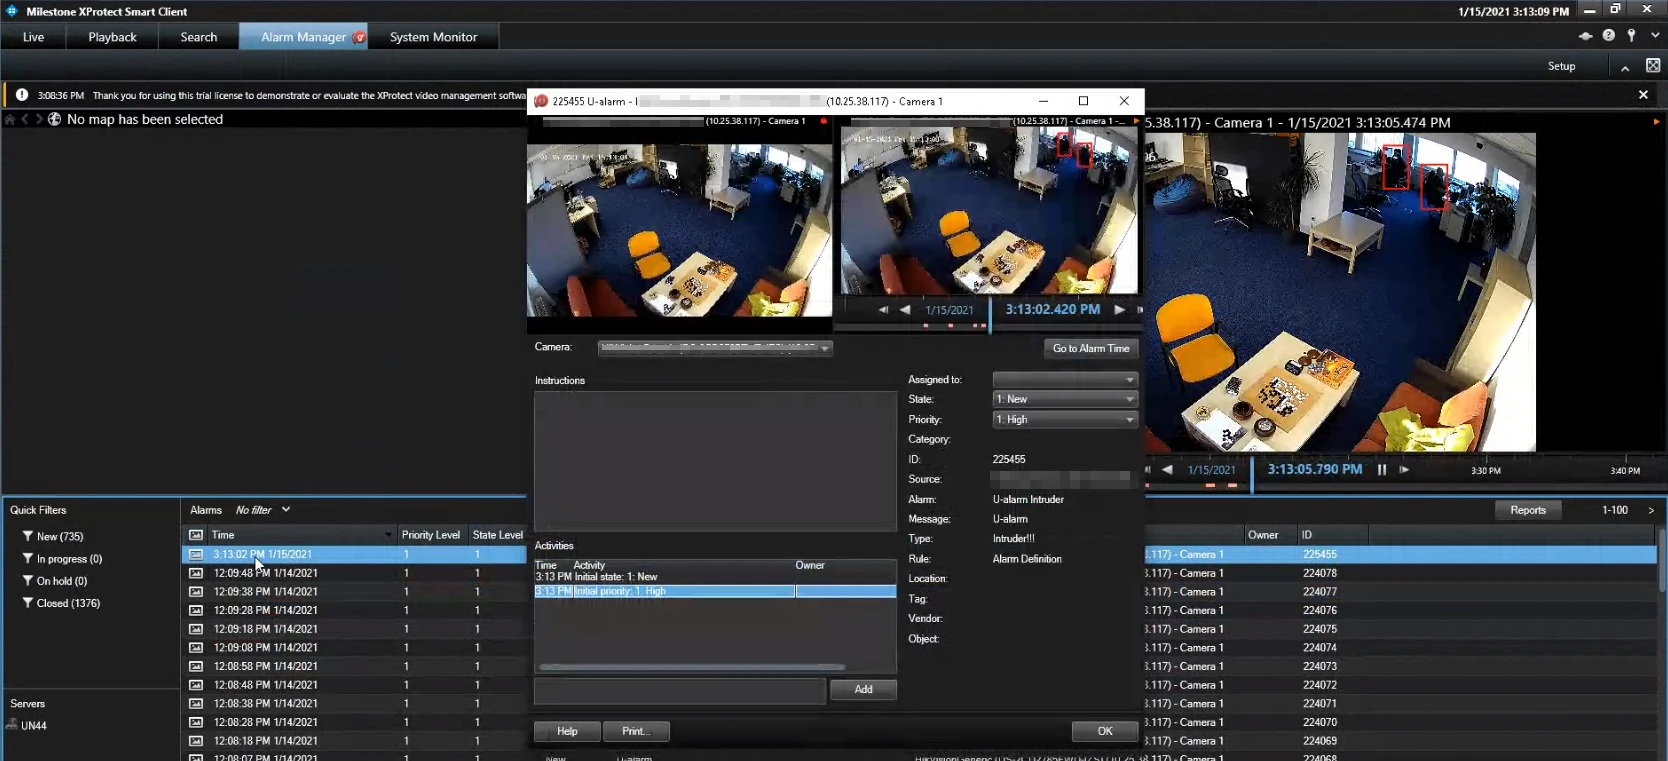
All done. You will receive alarms in the Alarm Manager.
Receiving alarms in Milestone XProtect
Whenever an Alarm is triggered by ForensiQ, it should be visible in Milestone XProtect Smart Client under the Alarm Manager tab with annotations.
Creating a custom view in Smart Client
- In the Milestone XProtect Smart Client, open the LIVE tab of the window.
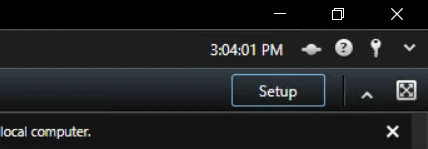
- Click the Setup button in the upper right corner of the window Certain elements of the interface will turn orange, indicating that they are now editable.
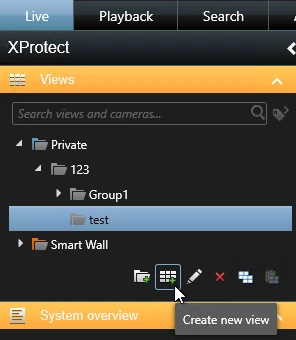
- On the left sidebar, select a View Group click Create new view. Choose any layout that contains at least one wide rectangle; in this example, layout 1+1+4 under category 4:3.
- On the left sidebar, under System overview, open Alarms click and drag the Alarm List and Alarm Preview items into the wide rectangles you created in the above step (into the two left-side rectangles in our example of a 1+1+4 grid).
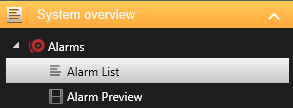
-
From the Camera menu on the left sidebar, drag any cameras of your choosing into the remaining rectangles.
-
Click the Setup button in the upper right corner of the window to exit editing and save your changes to the interface.
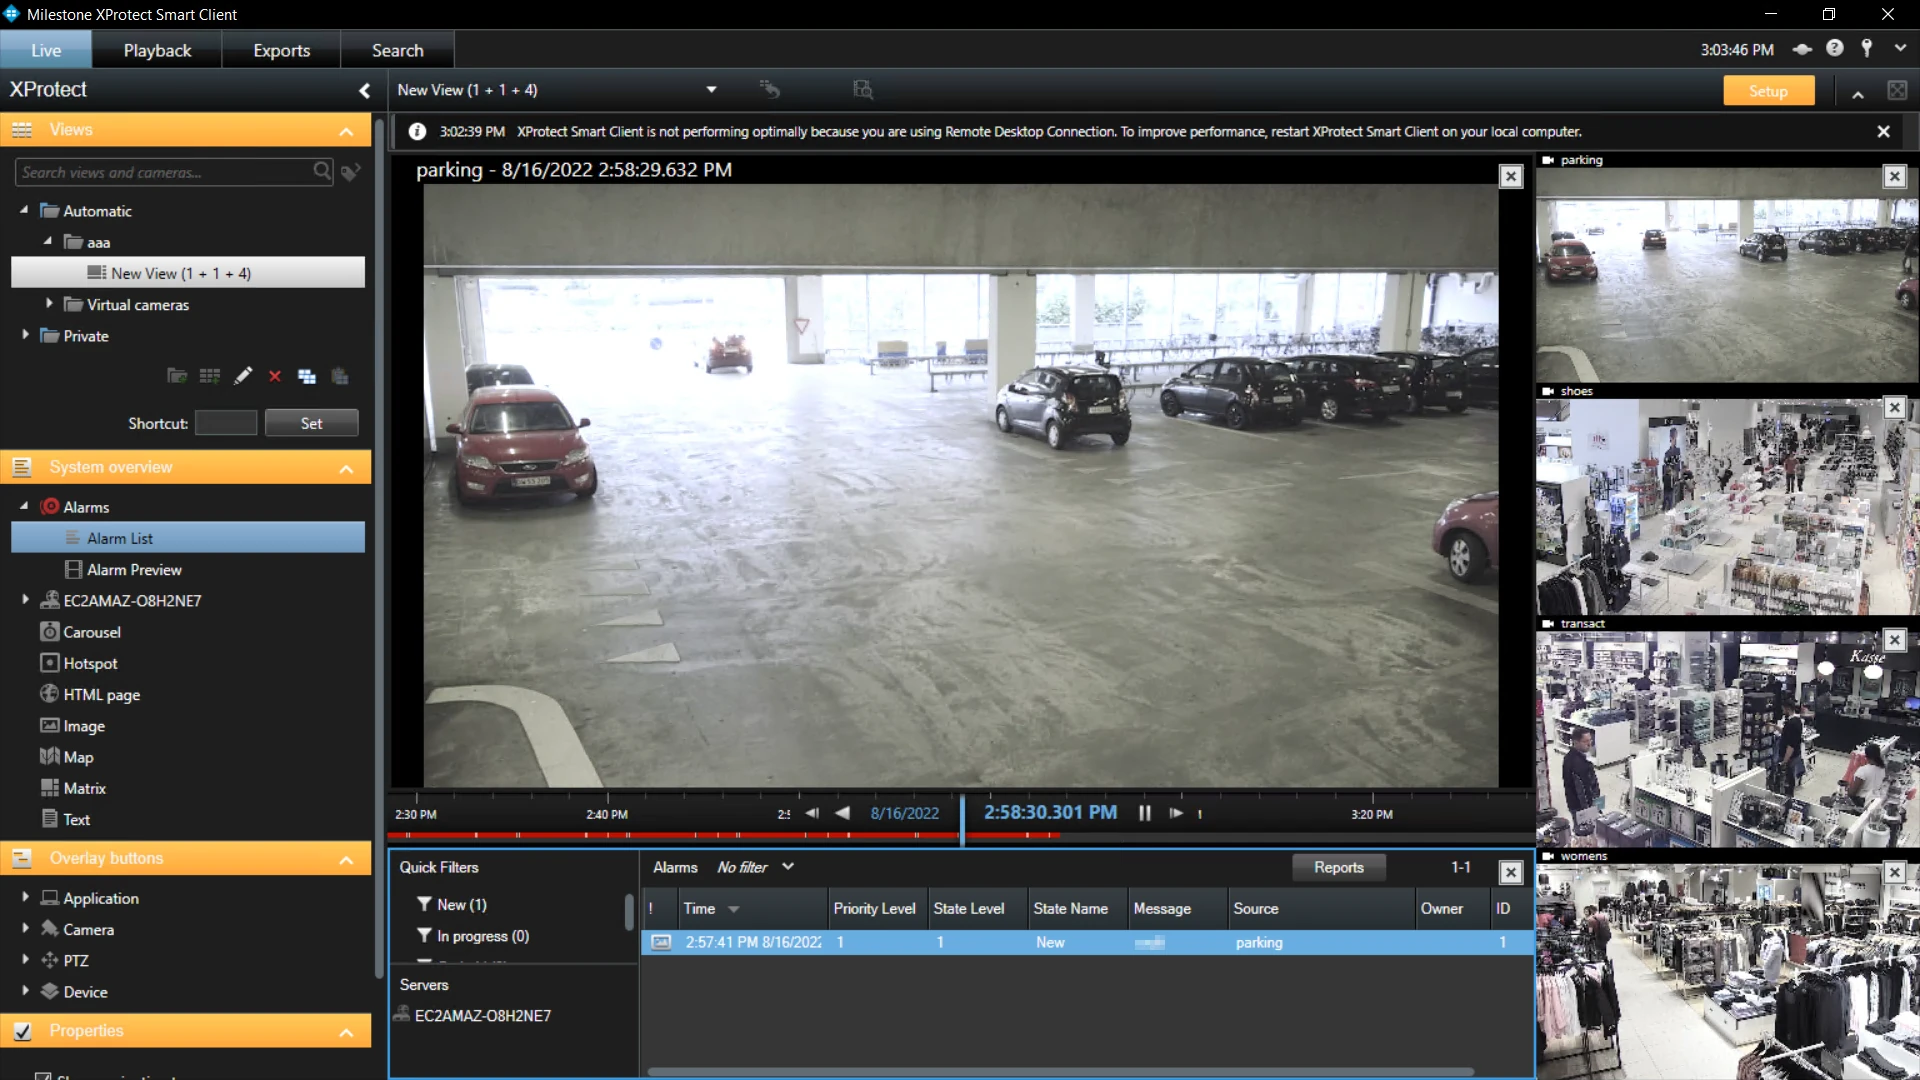
ForensiQ configuration
Alarms can be sent to Milestone XProtect, appearing as Analytics Events.
-
Open Settings from the top right corner of the ForensiQ web UI select Integrations from the dropdown menu.
-
Click the __ Add Integration Target__ button and select Milestone XProtect from the dropdown menu.
-
Fill in the following fields:
- Milestone XProtect Host Address:
http://<ip_address>:<port>
Where <ip_address> is the IP address of the server running Milestone XProtect, and <port> is the port number enabled earlier for the Analytics Event service (9090 by default).
- Analytics event name: Type the name of the Analytics Event you created in Milestone XProtect.
- Event display name: The display name of the event that will be shown in the event list.
- Description (optional): A description of your event.
- Timestamp offset (in milliseconds): The time offset between the Milestone XProtect Analytics Event and the ForensiQ detection. This can be used to synchronize the event with the video footage in Milestone XProtect, in case there is a time difference between the two systems.
Once Milestone XProtect is configured as an integration target, it will appear in the list of available alarm integrations when setting up a Live Rule.
Import cameras
You can import cameras through Open Network Bridge or manually.
Each camera's Technical name in ForensiQ should match its GUID in Milestone XProtect. This is done automatically when importing cameras via Open Network Bridge, but must be done manually when importing cameras one by one.
-
Install Milestone Open Network Bridge and its Management Client plug-in. Configure an integration user with access to the required cameras, live video and the bridge, and register that user as an ONVIF client in the bridge configuration.
-
Allow the backend to reach the bridge's ONVIF service on port 580 and the video-storage hosts to reach its RTSP service (port 554 by default). Then follow Milestone XProtect camera import, entering only the bridge hostname or IP address. The UI automatically uses
http://<bridge-host>:580/onvif/device_service.
This method uses ONVIF and RTSP only: Milestone XProtect API Gateway is not required. Camera import settings are independent of the Milestone XProtect Analytics event integration target. Installing Open Network Bridge does not itself configure alarm forwarding.
-
In the Milestone XProtect Management Client, go to the Site Navigation panel Cameras.
-
In the Devices panel, find the Cameras root node and click on it.
- Now, without clicking anywhere else, hold the Ctrl key and click on the specific camera.
- In the Properties panel on the right, under the Info tab, you will find the ID (GUID).
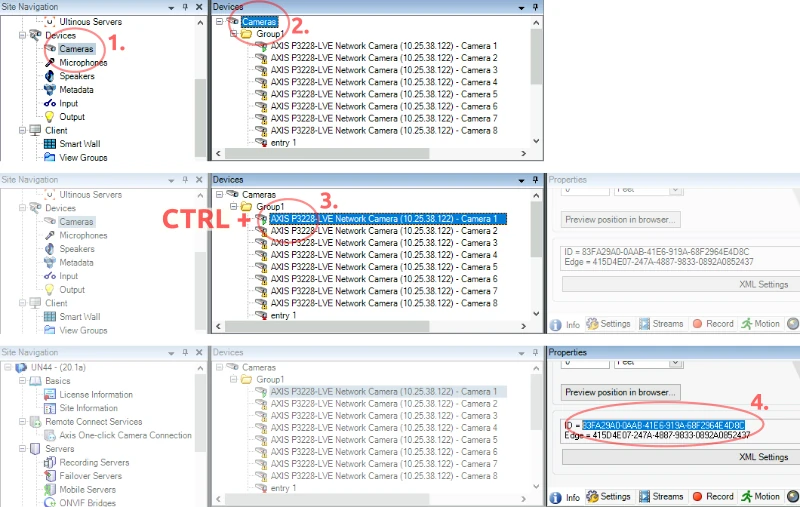
- Select the ID value and copy it to your clipboard.
Make sure that you don't copy any leading or trailing spaces. It is recommended to note down the required IDs.
- Paste it in ForensiQ as the Technical name. Please create each camera setting in ForensiQ accordingly.